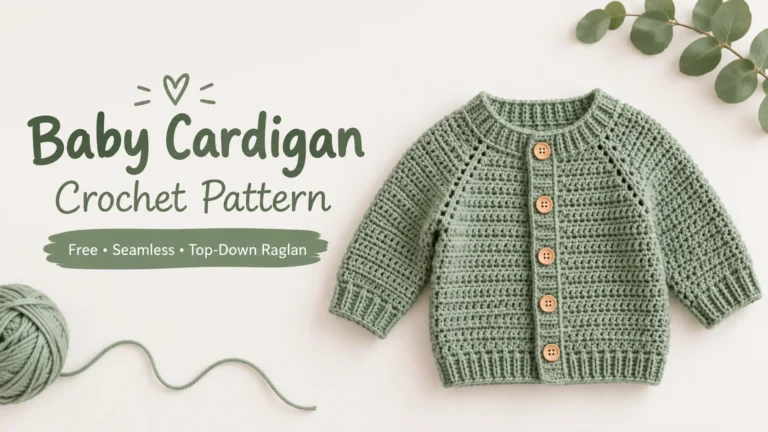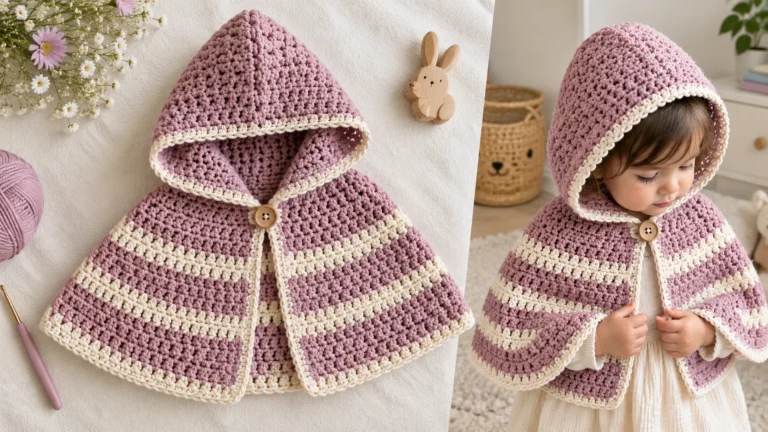
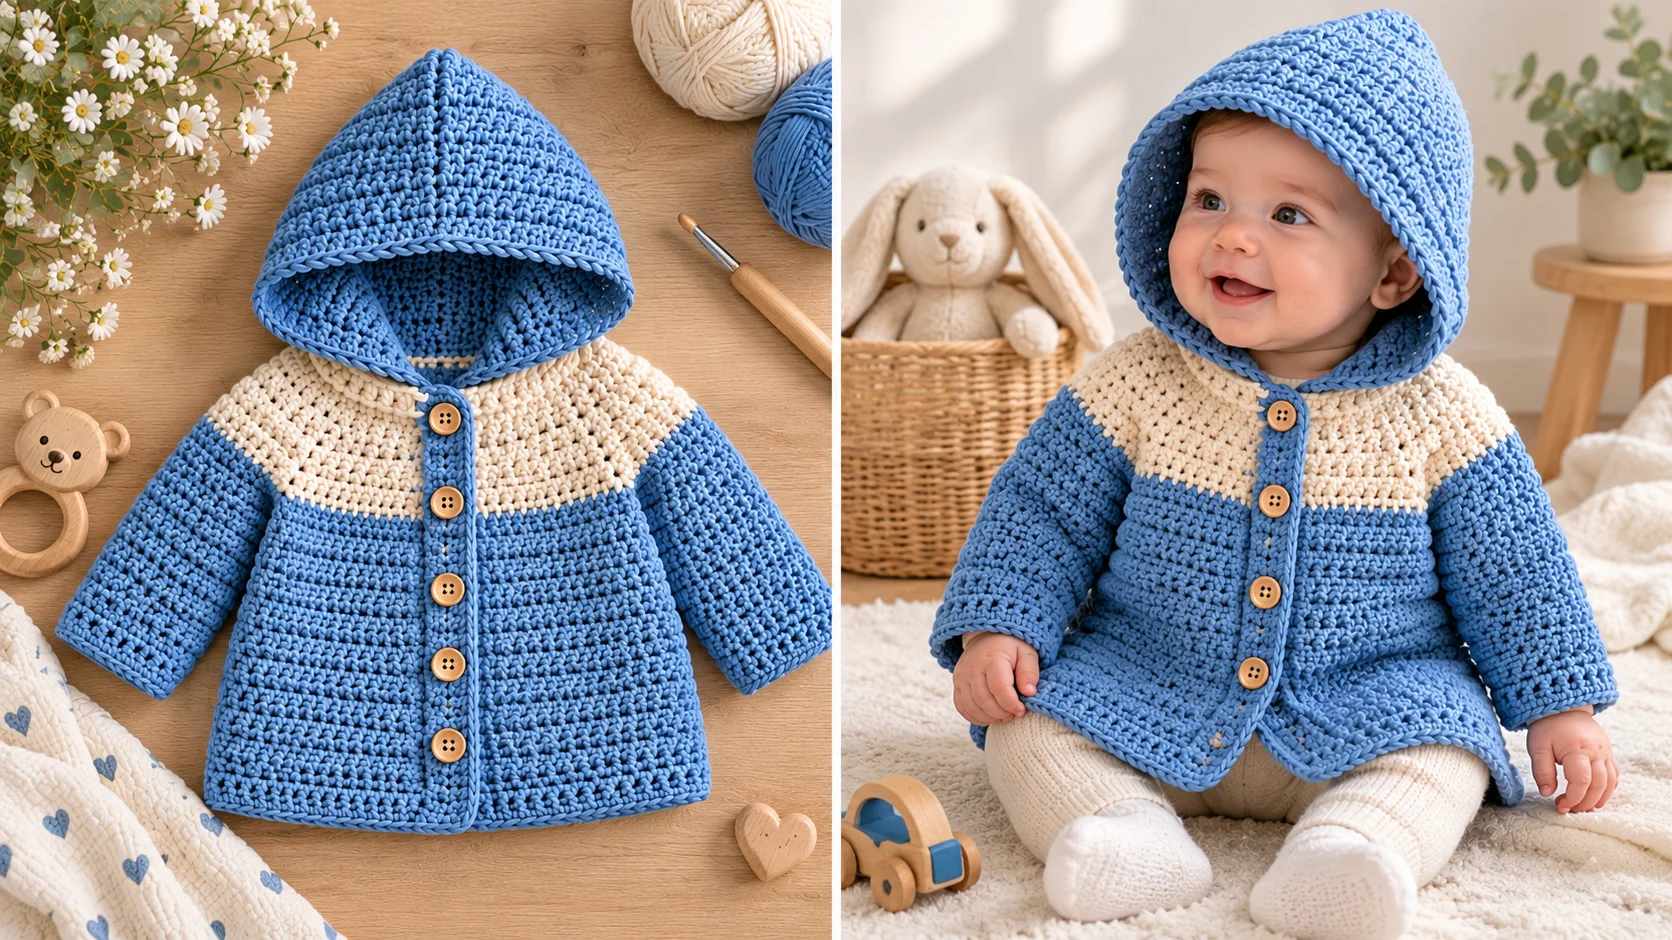
Free Crochet Baby Coat Pattern (Newborn to 2 Years)
A crochet baby coat is one of the most rewarding first garments you can make. Below you’ll find a beginner-friendly crochet baby coat pattern free to use, in five sizes from newborn to 2 years, with a size chart, yarn and hook advice, step-by-step instructions, and baby safety tips. It’s worked from the top down in simple half double crochet, so there’s almost no sewing, and you can try it on as you go. Let’s make something small, soft, and warm for your little one.
Table of Contents
Quick Answer
A crochet baby coat is a small, button-front jacket worked from the top down in half double crochet, using DK (light) yarn and a 4.0 mm hook. This free pattern makes five sizes, from newborn–3 months to 24 months, in about 6–10 hours, with a seamless yoke, sleeves worked straight from the armholes, and an optional hood.
Project Snapshot
| Detail | Info |
|---|---|
| Skill level | Easy (beginner-friendly) |
| Sizes | 3 mo (newborn–3 mo), 6 mo, 12 mo, 18 mo, 24 mo |
| Yarn weight | DK, CYC #3 Light |
| Hook | 4.0 mm (US G-6) |
| Yardage range | 240–370 yd (220–340 m), plus 70–110 yd for the hood |
| Gauge | 16 hdc × 12 rows = 4 in (10 cm) |
| Construction | Top-down raglan yoke, worked flat; sleeves in the round |
| Closure | 4–5 buttons |
| Time | 6–10 hours |
What Is a Crochet Baby Coat? Coat vs. Cardigan vs. Jacket
A crochet baby coat is a warm, open-front outer layer for babies and toddlers. The names overlap: a baby jacket is often shorter and lighter, a cardigan coat is a longer, sweater-like version, and a hooded coat adds a hood for wind and drizzle. This crochet baby coat sits in the middle: hip-length, with or without a hood. Shorten the body and it works as a crochet baby jacket pattern too.
Crochet Baby Coat Size Chart (Newborn–2 Years)
These sizes start from the Craft Yarn Council’s baby size chart of actual body measurements, plus about 3 in (7.5 cm) of ease, inside the Council’s 2–4 in “classic fit” range. Its chart begins at 3 months, so size 1 is roomy on a tiny newborn: a grow-into size.
| Size | Age | Body chest | Finished chest | Coat length | Sleeve | Yarn weight | Hook |
|---|---|---|---|---|---|---|---|
| 1 | Newborn–3 mo | 16 in (40.5 cm) | 19 in (48 cm) | 8 in (20 cm) | 6 in (15.5 cm) | DK | 4.0 mm |
| 2 | 6 mo | 17 in (43 cm) | 20 in (51 cm) | 9 in (23 cm) | 6½ in (16.5 cm) | DK | 4.0 mm |
| 3 | 12 mo | 18 in (45.5 cm) | 21 in (53 cm) | 9½ in (24 cm) | 7½ in (19 cm) | DK | 4.0 mm |
| 4 | 18 mo | 19 in (48 cm) | 22 in (56 cm) | 10 in (25.5 cm) | 8 in (20.5 cm) | DK | 4.0 mm |
| 5 | 24 mo | 20 in (50.5 cm) | 23 in (58 cm) | 10½ in (26.5 cm) | 8½ in (21.5 cm) | DK | 4.0 mm |
Coat length is measured from the back of the neck to the hem: the Craft Yarn Council’s back waist length plus about 2 in for hip length. Sleeve length is measured from the underarm.
How to Measure a Baby
Lay your baby on a flat surface, ideally with a helper. Measure around the fullest part of the chest, keeping the tape loose. Then measure from the base of the neck to the natural waist, and from armpit to wrist. If your baby falls between sizes, choose the larger one.
Materials: Yarn, Hook, and Notions
Best Yarn for a Crochet Baby Coat
| Fiber | Warmth | Washability | Best for | Caution |
|---|---|---|---|---|
| Cotton | Cool to medium | Machine washable; dries slowly | Spring and summer coats | Heavy when wet; can stretch and sag |
| Baby acrylic | Medium | Easy care; most can be machine washed and dried (check the label) | Everyday wear, beginners, tight budgets | Less breathable; can pill; never press with a hot iron |
| Superwash merino | High | Machine washable on gentle (check the label) | Cold-weather coats | Costs more; test for itchiness on sensitive skin |
| Bamboo blend | Cool, drapey | Gentle wash; dry flat | Lightweight summer coats | Drapey, so it can stretch out of shape |
Skip fuzzy, hairy, or eyelash yarns for newborns. Loose fibers can shed and tangle around tiny fingers, and they make stitches hard to see.
Yarn Amount by Size
| Size | Coat only | Coat with hood |
|---|---|---|
| 3 mo | 240 yd (220 m) | 310 yd (285 m) |
| 6 mo | 275 yd (250 m) | 355 yd (325 m) |
| 12 mo | 310 yd (285 m) | 400 yd (365 m) |
| 18 mo | 340 yd (310 m) | 440 yd (400 m) |
| 24 mo | 370 yd (340 m) | 480 yd (440 m) |
Half double crochet is dense, so these amounts include a safety margin. Buy one extra skein from the same dye lot.
Yarn Substitutions
Any DK yarn that gives you 16 hdc per 4 in (10 cm) will work. If you change yarn weight, check the math: body stitches ÷ your stitches per inch = finished chest. For example, 76 stitches at 3.5 per inch gives about 21.7 in. Pick the size that fits your baby, and expect different yardage.
Hook, Buttons, and Safe Closures
For this crochet baby coat you’ll need a 4.0 mm (US G-6) hook, four stitch markers, a tapestry needle, and 4–5 flat, sew-through buttons about ¾ in (2 cm) wide. Snaps or hook-and-loop tape are button-free options.
Gauge: How to Get the Right Fit
A swatch takes 15 minutes and saves hours of redoing, because gauge controls the chest width of your crochet baby coat.
- Chain 20. Hdc in the 2nd chain from the hook and across [19 sts].
- Ch 1, turn, and hdc in each stitch. Repeat until you have 14 rows.
- Wash and dry it the way you’ll care for the finished coat.
- Lay it flat and measure the center 4 in (10 cm).
You’re aiming for 16 stitches and 12 rows. Fewer than 16 stitches means your swatch is loose: try a hook 0.5 mm smaller. More than 16 means it’s tight: go up 0.5 mm. Stitch gauge matters more than row gauge.
Abbreviations
This crochet baby coat pattern uses US terms. Ch 1 at the start of a row doesn’t count as a stitch.
ch = chain · sl st = slip stitch · sc = single crochet · hdc = half double crochet · hdc2tog = half double crochet two together · st(s) = stitch(es) · pm = place marker · sm = slip marker · rnd = round · RS = right side
| US term | UK term |
|---|---|
| sl st (slip stitch) | ss (slip stitch) |
| sc (single crochet) | dc (double crochet) |
| hdc (half double crochet) | htr (half treble) |
| hdc2tog | htr2tog |
Free Crochet Baby Coat Pattern (Step by Step)
Here’s the full crochet baby coat pattern free to use. Numbers in [brackets] go with sizes 3 / 6 / 12 / 18 / 24 months. One number means every size.
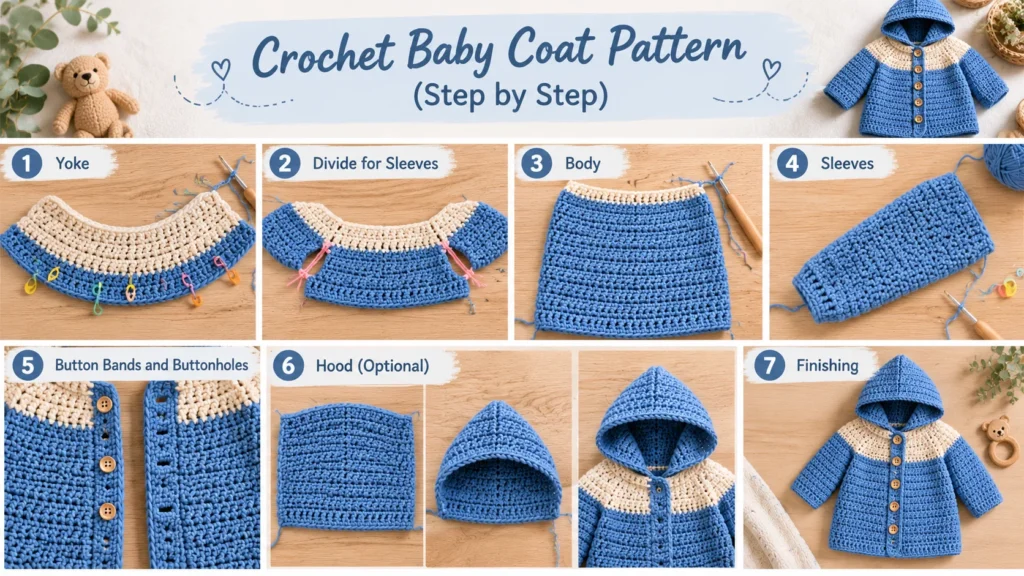
Step 1: Yoke
Build the neckline and shape the raglan lines, increasing at four points.
Ch 33.
Row 1: Hdc in the 2nd ch from hook and in each ch across [32 sts]. Place markers after stitches 6, 10, 22, and 26. That divides the row into front [6], sleeve [4], back [12], sleeve [4], and front [6].
Row 2 (increase): Ch 1, turn. Hdc across, and at each of the 4 markers work 2 hdc in the st before the marker, sm, then 2 hdc in the st after it [+8 sts].
Rows 3–[12 / 13 / 14 / 15 / 16]: Repeat Row 2. You’ll have [120 / 128 / 136 / 144 / 152] sts: each front [17 / 18 / 19 / 20 / 21], each sleeve [26 / 28 / 30 / 32 / 34], and back [34 / 36 / 38 / 40 / 42].
Step 2: Divide for Sleeves
Set the sleeves aside and join the front and back with underarm chains.
Ch 1, turn. Hdc across the first front [17 / 18 / 19 / 20 / 21], ch 4, skip the next sleeve [26 / 28 / 30 / 32 / 34 sts], hdc across the back [34 / 36 / 38 / 40 / 42], ch 4, skip the next sleeve, and hdc across the last front. Loop scrap yarn through the skipped stitches so they’re easy to find later.
Step 3: Body
Work straight rows down to hip length.
Ch 1, turn. Hdc in each hdc and each ch across [76 / 80 / 84 / 88 / 92 sts]. Repeat this row until the coat measures [8 / 9 / 9½ / 10 / 10½] in from the neck edge, about [11 / 13 / 14 / 14 / 15] rows. Fasten off.
Step 4: Sleeves
Rejoin at the underarm and work each sleeve in the round, tapering toward the cuff.
Rnd 1: Attach yarn at the underarm, ch 1, hdc in the back bump of each of the 4 underarm chains, then hdc in each skipped sleeve st. Join with a sl st to the first hdc [30 / 32 / 34 / 36 / 38 sts].
Rnds 2–4: Ch 1, hdc in each st around, join.
Rnd 5 (decrease): Ch 1, hdc2tog, hdc to the last 2 sts, hdc2tog, join [−2 sts].
Repeat Rnds 2–5 three more times [22 / 24 / 26 / 28 / 30 sts]. Then repeat Rnd 2 until the sleeve measures [6 / 6½ / 7½ / 8 / 8½] in from the underarm. Last rnd: sc in each st around. Fasten off. Make the second sleeve the same way.
Step 5: Button Bands and Buttonholes
Add a sturdy front edge with sc, plus evenly spaced buttonholes.
Row 1: With the right side facing, attach yarn at the bottom of the right front. Ch 1 and sc in each row-end up the edge [24 / 27 / 29 / 30 / 32 sc]. Don’t worry if you’re off by one or two; just spread the stitches evenly. Pin [4 / 4 / 5 / 5 / 5] markers where the buttons will go.
Row 2 (buttonholes): Ch 1, turn. Sc across, working (ch 2, skip 2 sc) at each marker.
Row 3: Ch 1, turn. Sc across, working 2 sc in each ch-2 space. Fasten off.
Work the other band the same way, but sc straight across in Row 2. Buttonholes traditionally go on the right for girls and the left for boys.
Step 6: Hood (Optional)
Pick up the neckline and work a rectangle that folds into a hood.
Row 1: Attach yarn at the right front neck corner. Ch 1 and hdc in the free loops of the 32 foundation chains, increasing [8 / 10 / 12 / 14 / 16] times evenly by working 2 hdc in one st [40 / 42 / 44 / 46 / 48 sts].
Next rows: Ch 1, turn, hdc in each st. Repeat until the hood is [7 / 7½ / 8 / 8½ / 9] in tall, about [21 / 23 / 24 / 26 / 27] rows.
Fold the hood in half and join the top edges with a slip stitch seam. Work 1 round of sc around the face opening.
Step 7: Finishing
Close up and tidy.
Weave in all ends. Sew the buttons opposite the buttonholes and tug-test each one. Block lightly.
Customizations
Make this crochet baby coat your own with these simple changes.
- Collar: Skip the hood. Work 4 rows of hdc along the neck edge and fold them back.
- Stripes: Change color every 2 rows. Carry the unused yarn loosely up the edge.
- Color-blocking: Make the yoke in one color and the body and sleeves in another.
- Trim: Finish the hem and hood with a round of shell stitch or reverse sc.
- Summer version: Use cotton or bamboo DK and skip the hood. For a short crochet baby jacket pattern, stop the body at the back waist length (6, 7, 7½, 8, 8½ in).
Baby Safety Checklist for Crochet Coats
Closures
Sew buttons on with strong thread and check them after every wash. Skip beads, sequins, and any trim that could come loose. Snaps or hook-and-loop tape work well instead.
No Neck Ties or Drawstrings
This coat has none. If you customize it, don’t add ties or cords at the neck or hood. Stick to buttons or snaps.
Car Seats: Why Bulky Coats Don’t Belong Under the Harness
The American Academy of Pediatrics says bulky clothing, including winter coats and snowsuits, shouldn’t be worn under a car seat harness. It can leave the straps loose without looking loose. NHTSA suggests buckling your baby in first, then laying a blanket over them or putting the coat on backwards over the harness. A thin crochet baby coat may be fine, but use the AAP pinch test: if you can pinch the strap at the collarbone, tighten it.
Yarn and Loose Ends
Weave ends in securely and trim them short. Check seams, bands, and button threads regularly, and retire the coat if anything frays.
How to Wash and Block a Crochet Baby Coat
Follow your yarn label first. For most baby acrylic and superwash wool, a gentle machine cycle in cool water works. Otherwise hand wash in lukewarm water with mild soap and don’t wring. Press out the water in a towel, then lay the coat flat. Shape the yoke, sleeves, and bands with your hands while it’s damp. Avoid hot irons, especially on acrylic.
Troubleshooting Common Mistakes
Most problems with a crochet baby coat have simple fixes.
- Tight armholes: Chain 6 instead of 4 at each underarm in Step 2. That adds about ½ in of room.
- Gappy buttonholes: Use ch 1 and skip 1 st for small buttons, or work the bands with a hook one size smaller.
- Hem flaring: Your tension loosened. Work the last 4 body rows with a smaller hook, or add a round of sc at the hem.
- Hood won’t sit right: Too deep? Remove 3 rows. Sliding back? Add the sc round around the face opening and check that the seam is centered.
Matching Crochet Baby Set Ideas
Use leftover yarn to make a set to match your crochet baby coat. [Internal link: crochet baby hat] · [Internal link: crochet baby booties] · [Internal link: crochet baby blanket] · [Internal link: crochet baby mittens]. Choose the same yarn so the colors match, and follow the same safety rules for every piece.
Crochet Baby Coat FAQ
How much yarn do I need for a crochet baby coat? You need 240–370 yards of DK yarn, depending on size, plus 70–110 yards for the hood. Half double crochet is dense, so buy one extra skein from the same dye lot. The yarn amount table above has the exact figures.
What size crochet baby coat should I make? Choose by your baby’s chest measurement, not age. Find the closest match in the body chest column of the size chart; the finished size already adds about 3 inches of ease. If your baby falls between sizes, size up, because babies grow fast.
What is the best yarn for a crochet baby coat? For everyday wear, soft baby acrylic or superwash merino is easiest, since both are usually machine washable and hold their shape. Cotton suits warm weather but can stretch. Avoid fuzzy or eyelash yarns for newborns, because loose fibers can shed.
How long does a crochet baby coat take? Plan on about 6–10 hours, depending on size and speed. The yoke goes quickly, while sleeves and button bands take longest. Add an hour or two for the optional hood. Beginners should expect the upper end.
Is a crochet baby coat safe in a car seat? Don’t wear it under the harness. The AAP says bulky clothing, including winter coats, shouldn’t go beneath a car seat harness. Buckle your baby in without the coat, then put it on them backwards over the buckled harness, as NHTSA suggests.
Can a beginner make this crochet baby coat? Yes. You only need chain, slip stitch, single crochet, half double crochet, and one simple decrease. The top-down yoke has almost no seaming, and you can check the fit as you go. Make a swatch first, then take it one step at a time.
How do I add a hood to a crochet baby coat? Work into the 32 foundation chains at the neck, increase to 40–48 stitches in the first row, and crochet even rows until the hood is 7–9 inches tall. Then fold it in half and slip stitch the top seam. Step 6 has the full details.
How do I wash a crochet baby coat? Check your yarn label first. Most baby acrylic and superwash wool can go in a gentle machine cycle with cool water. Otherwise, hand wash in lukewarm water, press out the water without wringing, and dry flat. Reshape the coat while it’s damp.
Coat vs. cardigan: what’s the difference? A cardigan is usually a lighter, sweater-weight layer, while a coat is longer, warmer, and often hooded. This pattern works for both. Use warmer yarn and add the hood for a coat, or choose lighter yarn and skip the hood for a cardigan.
Can I sell finished crochet baby coat items? [Add your own policy here, for example: “Yes, you may sell items you make from this pattern. Please credit this page and don’t resell or share the pattern itself.”] Rules for selling children’s products differ by country, so check your local requirements before you sell.
Key Takeaways
- This crochet baby coat is a free, beginner-friendly, top-down pattern in five sizes.
- Choose your size by chest measurement, swatch first, and pick washable yarn.
- Always buckle your baby into the car seat without the coat, then put it on them backwards over the harness.
Save this crochet baby coat pattern to Pinterest so you can find it later.