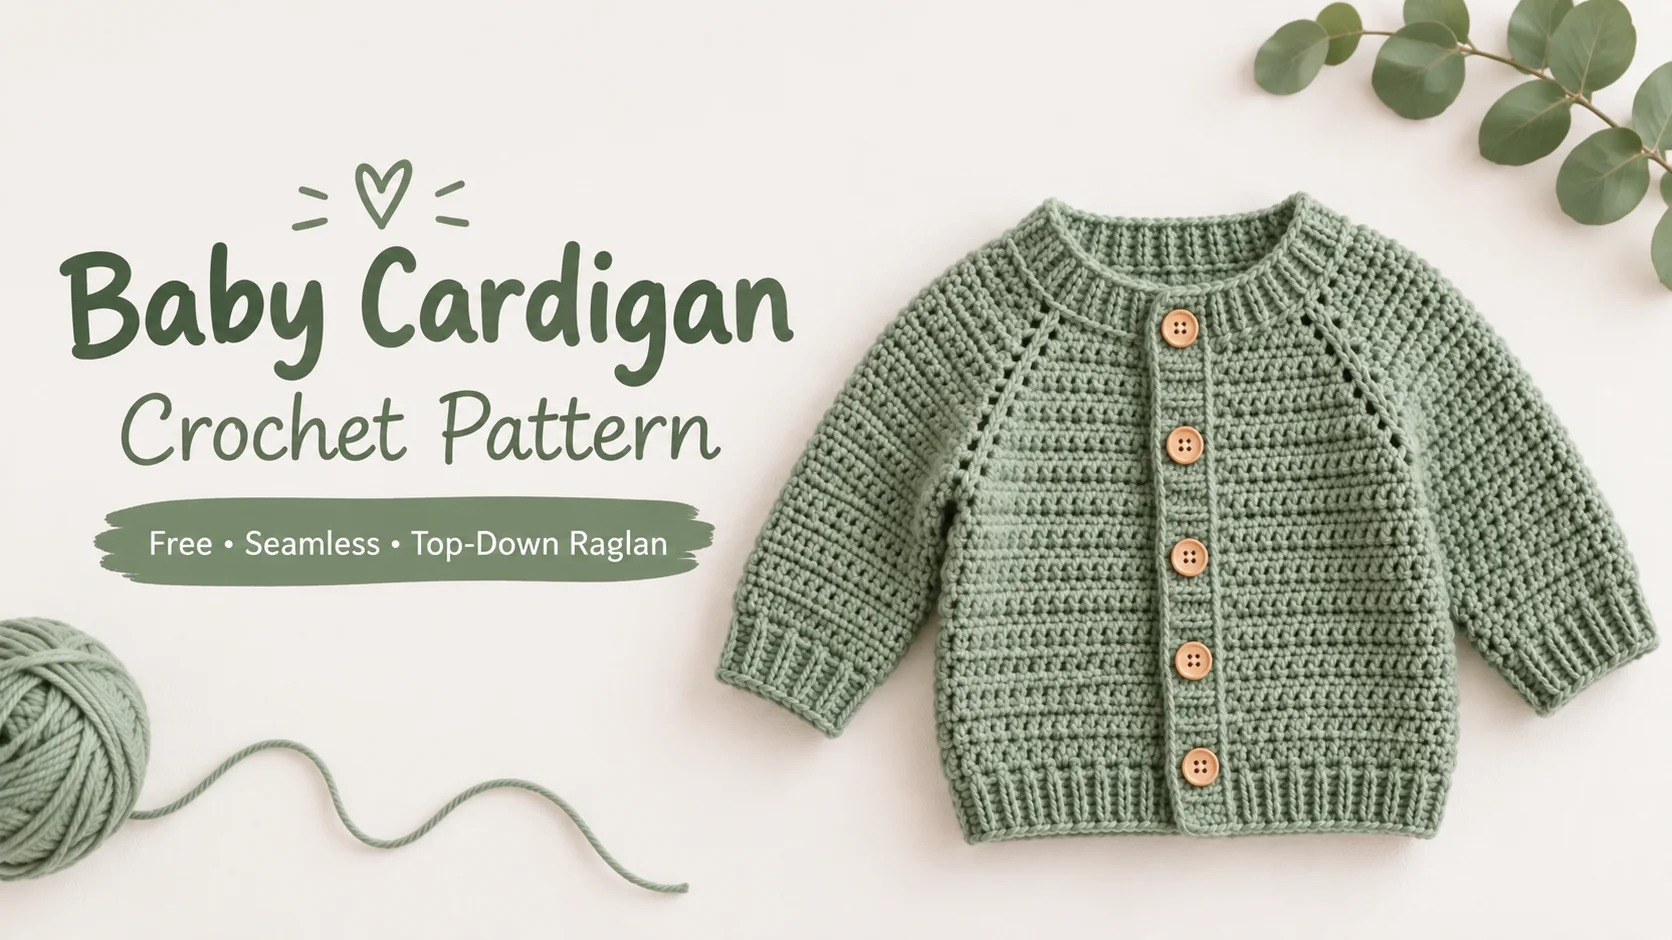
Free Crochet Baby Cardigan Pattern: Easy & Seamless, 6 Sizes
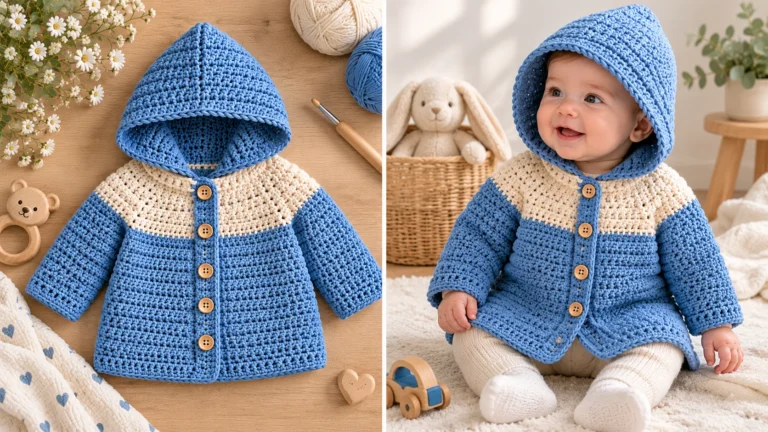
Making an easy crochet baby cardigan doesn’t have to mean hours of seaming, confusing shaping, or floppy seams that irritate sensitive newborn skin. This free crochet baby cardigan pattern walks you through a fully seamless baby cardigan crochet construction, worked from the neck down in one continuous piece — no sewing required.
Table of Contents
Quick Project At-A-Glance
This crochet baby cardigan pattern is a free, seamless top-down raglan in six sizes, worked in DK yarn with a 4.0 mm hook.
- Skill level: Advanced beginner / easy
- Construction: Top-down raglan, 100% seamless (no sewing pieces together)
- Sizes included: Preemie, 0–3M, 3–6M, 6–12M, 12–18M, 18–24M
- Yarn weight: DK (light worsted / Category 3)
- Hook size: 4.0 mm (US G/6), plus 3.5 mm (US E/4) for ribbed cuffs
- Time to complete: About 3–5 hours for experienced crocheters, 5–7 hours for beginners
- Terminology: US terms (UK equivalents below)
Want an easy crochet baby cardigan with no pieces to sew together? This seamless baby cardigan crochet design grows from the neckline down, so you can check the fit against a onesie as you work. Whether it’s a baby shower gift or for your own little one, this free crochet baby cardigan pattern has clear stitch counts, a gauge guide and safety-first finishing tips.
Why Choose a Top-Down Raglan Crochet Baby Cardigan Pattern?
Seamless top-down construction is more forgiving than piecing a sweater together. You can try the yoke on the baby or measure it against a favorite onesie as you go, so there’s no guessing about fit, and zero seams means nothing rubs against sensitive newborn skin. It’s also a great easy crochet baby cardigan for a first garment: just chains, single crochet and double crochet, with raglan increases at four corners.
Materials & Yarn Selection
Recommended Yarns (Soft & Machine-Washable)
Babies drool, spit up and chew their sleeves, so choose a soft, machine-washable DK yarn and avoid rough fibers that can irritate delicate skin. Look for the OEKO-TEX Standard 100 label, which means the yarn was tested for harmful substances. Good options include Paintbox Yarns Baby DK, Stylecraft Special DK or a bamboo/cotton blend. Always confirm certification on the current ball band.
Yardage by Size
| Size | Yards / Meters | Skein Count (50 g) |
|---|---|---|
| Preemie | 110 yd / 100 m | 1 |
| 0–3M | 180 yd / 165 m | 2 |
| 3–6M | 220 yd / 200 m | 2 |
| 6–12M | 270 yd / 245 m | 3 |
| 12–18M | 330 yd / 300 m | 3 |
| 18–24M | 400 yd / 365 m | 4 |
Yardage is approximate and assumes 50 g balls of about 120 yd (110 m). Buy an extra ball if you’re between sizes.
Notions & Tools
- 4.0 mm and 3.5 mm crochet hooks
- 4 stitch markers (essential for marking the raglan corners)
- Yarn needle and sharp scissors
- 3–5 baby-safe flat buttons (12–15 mm) or wooden toggles
- Strong sewing thread for attaching buttons
Sizing, Measurements & Gauge Swatch
Skipping the swatch is the top reason a baby sweater comes out too tight or too loose, so every crochet baby cardigan pattern deserves one. Crochet a 6 in (15 cm) dc square with your 4.0 mm hook, wash and dry it the way you’ll care for the finished cardigan, then measure the center.
Gauge Specification
16 dc × 9 rows = 4 in × 4 in (10 cm × 10 cm) using a 4.0 mm hook. Too many stitches? Go up a hook size. Too few? Go down.
Sizing Chart
| Age Size | Finished Chest Circumference | Garment Length | Armhole Depth |
|---|---|---|---|
| Preemie | 15 in (38 cm) | 6.5 in (16.5 cm) | 3.5 in (9 cm) |
| 0–3M | 17 in (43 cm) | 8 in (20 cm) | 4 in (10 cm) |
| 3–6M | 18 in (46 cm) | 9 in (23 cm) | 4.5 in (11.5 cm) |
| 6–12M | 19.5 in (49.5 cm) | 10 in (25.5 cm) | 5 in (12.5 cm) |
| 12–18M | 20.5 in (52 cm) | 11 in (28 cm) | 5.25 in (13.5 cm) |
| 18–24M | 21.5 in (54.5 cm) | 12 in (30.5 cm) | 5.75 in (14.5 cm) |
Chest is measured at the underarm with the fronts meeting, before button bands. Length is measured from the back neck.
Stitch Abbreviations & Terminology Key
| Abbreviation | US Term (used here) | UK Equivalent |
|---|---|---|
| Ch | Chain | Chain |
| Sl st | Slip stitch | Slip stitch |
| Sc | Single crochet | Double crochet (dc) |
| Dc | Double crochet | Treble crochet (tr) |
| Dc2tog | Double crochet 2 together | Treble 2 together (tr2tog) |
| Inc (Corner V-stitch) | [1 dc, ch 2, 1 dc] in same space | [1 tr, ch 2, 1 tr] in same space |
| BLO | Back loop only (for ribbing) | Back loop only |
| RS | Right side | Right side |
Step-by-Step Crochet Baby Cardigan Pattern Instructions
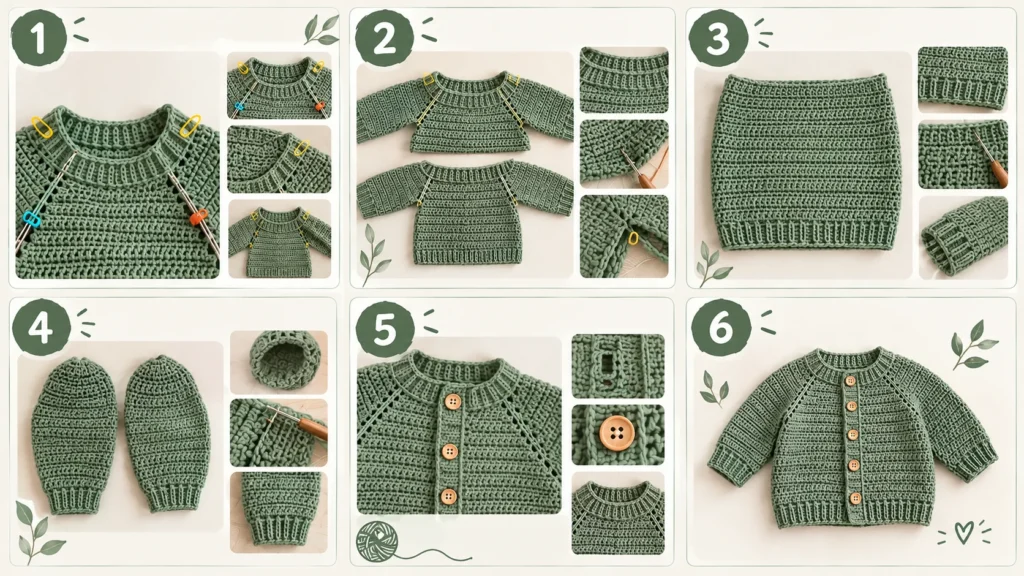
Before you begin: This crochet baby cardigan pattern uses US terms. Numbers in parentheses follow the size order Preemie, 0–3M, 3–6M, 6–12M, 12–18M, 18–24M; one number applies to every size. Stitch counts appear in [brackets] at the end of each row. A starting ch 3 counts as a dc: skip the first stitch of the row below and finish each row with a dc in the top of the turning chain. “Corner” means (dc, ch 2, dc) in the same space. Use the 4.0 mm hook unless told otherwise.
Section 1 — The Raglan Yoke (Neck Down to Armholes)
Seamless baby cardigan crochet starts at the neck: build the yoke with four corner increases, then divide for the sleeves.
Foundation: Ch (32, 36, 36, 38, 38, 38).
Row 1 (RS): Dc in 4th ch from hook and in next 3 ch (skipped chs count as first dc). Corner in next ch. Dc in next 3 ch. Corner in next ch. Dc in next (10, 14, 14, 16, 16, 16) ch for the back. Corner in next ch. Dc in next 3 ch. Corner in next ch. Dc in last 5 ch. Place a stitch marker in each of the 4 corner spaces. [34, 38, 38, 40, 40, 40 dc + 4 ch-2 sps]
Row 2 (Increase Row): Ch 3, turn. Dc in each dc to the first marked corner space, corner in that space. Repeat for all 4 corners, then dc in each remaining dc, ending in the top of the turning ch. Move the markers up each row. [42, 46, 46, 48, 48, 48 dc + 4 ch-2 sps]
Rows 3–(8, 9, 10, 11, 12, 13): Repeat Row 2. Each row adds 8 dc. [90, 102, 110, 120, 128, 136 dc + 4 ch-2 sps]
Try-on tip: Lay the yoke against a onesie or the baby. The depth from neck edge to underarm should match the Armhole Depth in the sizing chart.
Section 2 — Separating Sleeves & Body (The Divide Step)
Now you’ll park the sleeve stitches and chain across the underarms to form the armholes. Check your counts first:
| Size | Each Front | Back | Each Sleeve | Body Total |
|---|---|---|---|---|
| Preemie | 13 | 26 | 19 | 60 |
| 0–3M | 14 | 32 | 21 | 68 |
| 3–6M | 15 | 34 | 23 | 72 |
| 6–12M | 16 | 38 | 25 | 78 |
| 12–18M | 17 | 40 | 27 | 82 |
| 18–24M | 18 | 42 | 29 | 86 |
Front counts include the turning ch and the dc beside the corner. Sleeve counts exclude the corner spaces. Body Total counts each underarm ch as a stitch.
Divide Row (Row 9, 10, 11, 12, 13, 14): Ch 3, turn. Dc in each dc across the right front to the first marked corner. Ch 4 for the underarm. Skip the corner space, all sleeve dc and the next corner space. Dc in each dc across the back. Ch 4. Skip the next corner space, all sleeve dc and the last corner space. Dc in each dc across the left front, ending in the top of the turning ch. [60, 68, 72, 78, 82, 86 sts]
Section 3 — Working the Main Body
Work flat, back and forth, until the body is nearly at your target length.
Body Rows: Ch 3, turn. Dc in each st across, working 1 dc in each underarm ch and ending in the top of the turning ch. Work (4, 6, 7, 9, 10, 11) rows total, or until the body is about 1 in (2.5 cm) shorter than your target length. [60, 68, 72, 78, 82, 86 sts]
Hem Ribbing: Ch 1 (does not count), turn. Sc BLO in each st across. Repeat for 4 rows total, then fasten off. [60, 68, 72, 78, 82, 86 sc]
Section 4 — Working the Sleeves (In the Round)
Make two identical sleeves.
Round 1: With RS facing, join yarn with a sl st in the 2nd underarm ch. Ch 3 (counts as dc), dc in next 2 underarm ch, dc in the corner space, dc in each skipped sleeve dc, dc in the next corner space, dc in the last underarm ch. Join with a sl st to the top of the ch 3. [25, 27, 29, 31, 33, 35 sts]
Plain Round: Ch 3, dc in each st around, join. [no change]
Decrease Round: Ch 3, dc2tog over next 2 sts, dc in each st to last 2 sts, dc2tog over last 2 sts, join. [2 fewer sts]
Shaping: Work [(1, 1, 2, 2, 3, 3) plain rounds, then 1 decrease round] 3 times. Then work (0, 2, 0, 2, 2, 4) plain rounds. [19, 21, 23, 25, 27, 29 sts]
Ribbed Cuff: Switch to the 3.5 mm hook. Ch 1 (does not count), sc BLO in each st around, join with a sl st to the first sc. Repeat for 5 rounds total, then fasten off. [19, 21, 23, 25, 27, 29 sc]
Sleeve length is about (4, 5, 5.5, 6.5, 7.5, 8.5) in including the cuff.
Section 5 — Button Bands & Collar Finishing
Band Row 1 (RS): With the 4.0 mm hook, join yarn at the bottom of the front edge that will carry the buttonholes. Ch 1. Sc evenly up that front (about 1 sc per hem row-end and 2 sc per dc row-end), 1 sc in each foundation ch around the neck, then sc evenly down the other front. Each front edge is about (30, 36, 40, 46, 50, 54) sc. [about 92, 108, 116, 130, 138, 146 sc]
Band Row 2 (Buttonhole Row): Ch 1, turn. Sc in each sc up the first front and around the neck. Down the buttonhole front, work evenly spaced buttonholes: ch 2, skip 2 sc (use ch 1, skip 1 for smaller buttons). Make 3 buttonholes for Preemie–0–3M, 4 for 3–12M and 5 for 12–24M. Put the first about 4 sts above the hem and the last about 4 sts below the neck. Sc in all remaining sts. [same count as Row 1]
Band Row 3: Ch 1, turn. Sc in each sc and 2 sc in each ch-2 space. [same count as Row 1]
Fasten off. For a taller collar, work 1–2 more sc rows across the neck stitches only, turning each row. [about 32, 36, 36, 38, 38, 38 sc]
Baby Safety & Finishing
Finishing matters as much as the crochet baby cardigan pattern itself, because baby clothes get tugged, chewed and washed constantly.
Safe Button Attachment
Buttons are a choking hazard, so sew them on as if the baby will pull at them. Use doubled strong sewing thread instead of yarn and pass through the holes at least 8–10 times. Wrap the thread around the stitches under the button, knot it firmly on the inside and weave in the tail. Finish with a firm tug test. For Preemie and newborn sizes, skip buttons: use soft crochet ties (ch 25, about 6 in, sewn inside the band edges in 2–3 pairs) or soft snaps.
Weaving In Ends Securely
Use the 3-way weave so ends survive the washing machine. Thread the tail on a yarn needle and weave about 2 in (5 cm) along the wrong side, turn and weave back through different stitches, then weave diagonally for a third pass. Stretch the fabric gently before trimming close.
Blocking Your Baby Garment
For wet blocking, soak the cardigan in lukewarm water with a gentle wash for 15–20 minutes, press out the water in a towel (don’t wring) and dry it flat, shaped to the sizing chart. For gentle steam blocking, hold a steamer or iron a couple of inches above the fabric and never press down on acrylic, which can melt or flatten permanently. Test on your swatch first.
Frequently Asked Questions About This Crochet Baby Cardigan Pattern
Q: How long does it take to crochet a baby cardigan?
A: An experienced crocheter can usually finish a 0–3 month cardigan in 3 to 4 hours. A beginner should plan for 5 to 7 hours, including sleeve construction, button bands and button attachment. Larger sizes take longer, and a gauge swatch adds about 15 minutes.
Q: What is the best yarn for a crochet baby cardigan?
A: The best choice is a soft, lightweight DK (Category 3) acrylic or cotton-acrylic blend labeled machine-washable. Look for OEKO-TEX Standard 100 certification, which means the yarn has been tested for harmful substances. Avoid scratchy fibers, since babies have sensitive skin and often chew on their sleeves.
Q: Can a beginner crochet a baby cardigan?
A: Yes. This easy crochet baby cardigan uses only chains, single crochet and double crochet, with no seaming, making it a good first garment for an advanced beginner. If you can follow row counts and make a gauge swatch, you can finish it. A larger size is more forgiving.
Q: What size cardigan should I crochet for a baby shower gift?
A: Crochet size 6–12 months if the baby hasn’t been born yet. Newborns outgrow 0–3 month clothing quickly, while a larger size gives months of wear, often through the next season. Choose machine-washable yarn and include a care tag so parents know how to wash it.
Final Thoughts
You now have a free crochet baby cardigan pattern in six sizes that you can fit-check as you go. Swatch first, verify your counts at the end of each row, and finish with secure ends and safe closures. Share your seamless baby cardigan crochet project on Ravelry or Instagram. I’d love to see your version!
One Comment