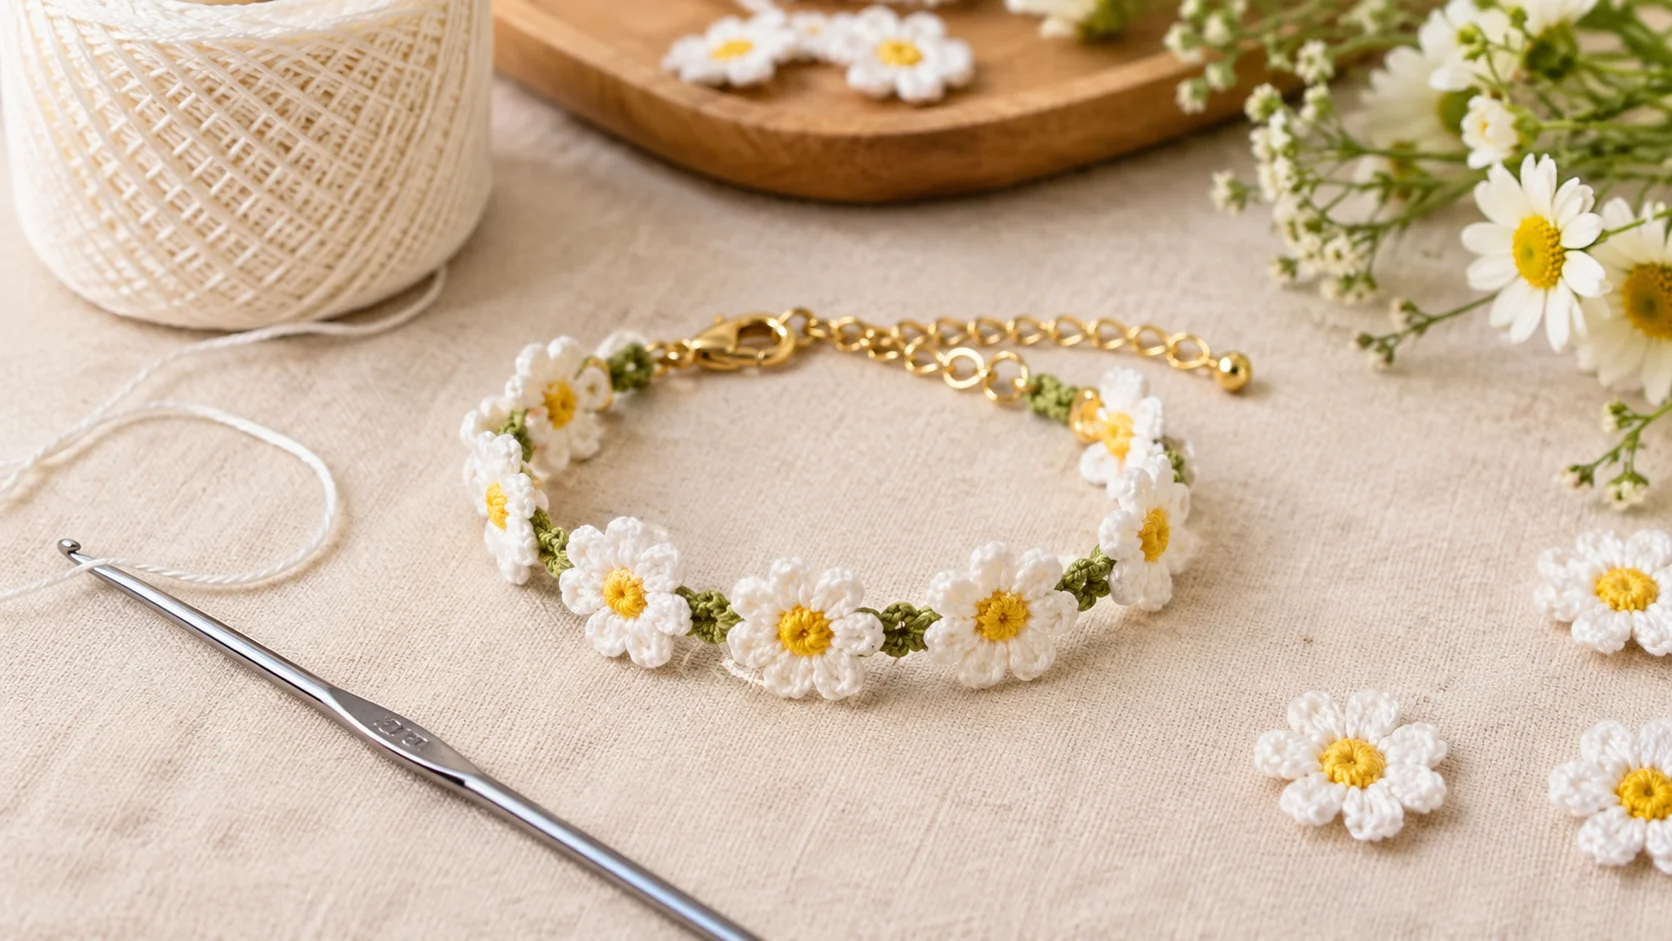
Floral Crochet Bracelet: Free Pattern & Sizing Guide
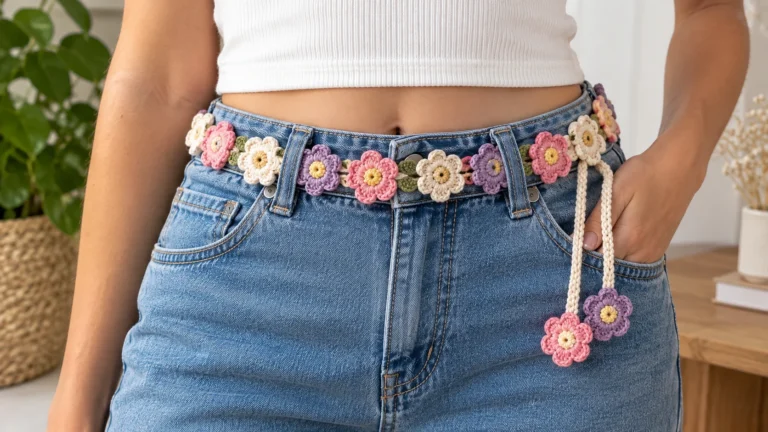
A floral crochet bracelet is a beautiful way to turn a little cotton thread into handmade jewelry. Whether you love delicate white daisies, colorful flower chains, or vintage-inspired crochet accessories, this project lets you create a lightweight bracelet that reflects your personal style.
This free floral crochet bracelet pattern is designed for beginner and advanced-beginner crocheters. It uses small flower motifs, simple crochet stitches, and a reinforced band to help your finished bracelet keep its shape. You will also learn how to measure your wrist, connect the flowers, attach jewelry findings, and finish your bracelet for a polished look.
If you have been searching for a crochet flower bracelet pattern that combines delicate details with practical construction, this tutorial will guide you through the process from the first stitch to the final clasp.
Table of Contents
1. Quick Project Snapshot
| Project detail | Information |
|---|---|
| Skill level | Beginner to Advanced Beginner |
| Time required | Approximately 45–60 minutes |
| Hook size | 1.75 mm–2.25 mm steel crochet hook |
| Yarn | Size 10 or size 3 mercerized cotton thread |
| Finished size | Adjustable; typically 6.5–7.5 inches, including clasp |
| Main techniques | Magic ring, chain, slip stitch, double crochet, treble crochet, and picot |
| Construction | Small flower motifs joined into a bracelet band |
| Closure | Lobster clasp, jump rings, or a crocheted button loop |
Best beginner tip: Make one flower first and measure it before crocheting the remaining motifs. Small differences in thread thickness, hook size, and tension can change the final bracelet length.
2. Materials & Tools for Long-Lasting Crochet Jewelry
The best materials for a floral crochet bracelet are fine mercerized cotton thread and lightweight, secure jewelry findings. Mercerized cotton creates defined petals with less stretch than many ordinary yarns, while properly fitted metal hardware provides a practical closure for everyday wear.
Yarn Selection
Mercerized cotton thread is the preferred choice for delicate crochet jewelry because it has a smooth surface, a subtle sheen, and good stitch definition.
Suitable options include:
- Size 10 crochet cotton for delicate flowers and fine details.
- Size 3 crochet thread for slightly larger, more visible petals.
- A small amount of contrasting cotton thread for flower centers, petals, and connecting chains.
Brands such as Aunt Lydia’s crochet thread and DMC cotton thread offer options worth considering. Check the specific product’s thickness and recommended hook size rather than assuming all products in a brand have identical properties.
Why not use standard acrylic yarn? It can work for a larger, casual bracelet, but many acrylic yarns are too bulky for tiny flower motifs. Depending on the yarn, they may also stretch, pill, or lose crisp petal definition with repeated use.
Mercerized cotton is not completely waterproof or stretch-proof, so the bracelet still needs careful handling and proper finishing.
Hardware & Jewelry Findings
Gather the following tools and supplies:
- One small lobster clasp.
- Two or more 4–6 mm jump rings, depending on your end design.
- Fine jewelry pliers.
- Small scissors.
- A yarn needle with an eye suitable for your thread.
- Optional jewelry extender chain.
- Optional fabric stiffener.
A crocheted button loop is an alternative if you prefer an all-crochet closure.
Pro tip: Use sturdy, appropriately sized jump rings and reinforce the bracelet ends before attaching them. Double-loop or closed-loop findings can provide additional security, provided their openings and dimensions suit your design. Never force a metal ring through delicate crochet stitches.
3. Wrist Measurement & Motif Sizing Chart
A comfortable floral bracelet should sit securely without squeezing your wrist. Because small crochet flowers can stretch or shift at their joining points, measuring the actual finished band is more reliable than counting motifs alone.
How to Calculate Your Bracelet Length
Measure your wrist with a flexible tape measure where you want the bracelet to sit.
Use this formula as a starting point:
Target floral band length = Wrist circumference − Clasp allowance
For example, if your wrist measures 6.75 inches and your clasp and end fittings together add 0.75 inch, aim for a floral band approximately 6 inches long.
This assumes you want a close, comfortable fit. If you prefer a looser bracelet, add a little wearing ease or use an extender chain.
Floral Crochet Bracelet Sizing Chart
| Wrist size | Wrist circumference | Suggested flower count | Approximate band length, excluding clasp |
|---|---|---|---|
| Child / Petite | 5.5–6 inches | 6 motifs | Around 5 inches |
| Small / Medium | 6.5–7 inches | 7–8 motifs | Around 6 inches |
| Large / Plus | 7.5–8 inches | 9 motifs | Around 7 inches |
These figures are estimates for small size 10 thread flowers. Your own motifs may be smaller or larger, so measure the band as you work.
How to get the best fit: Crochet two or three flowers, join them using your chosen method, and measure the resulting section. Use that measurement to estimate how many flowers you need, then check the complete band against your wrist before adding the clasp.
4. Step-by-Step Floral Crochet Bracelet Pattern
This beginner-friendly pattern creates a row of five-petal flowers with contrasting centers. You can use white petals with yellow centers for a classic daisy chain crochet bracelet, or experiment with pink, lilac, coral, and other colors.
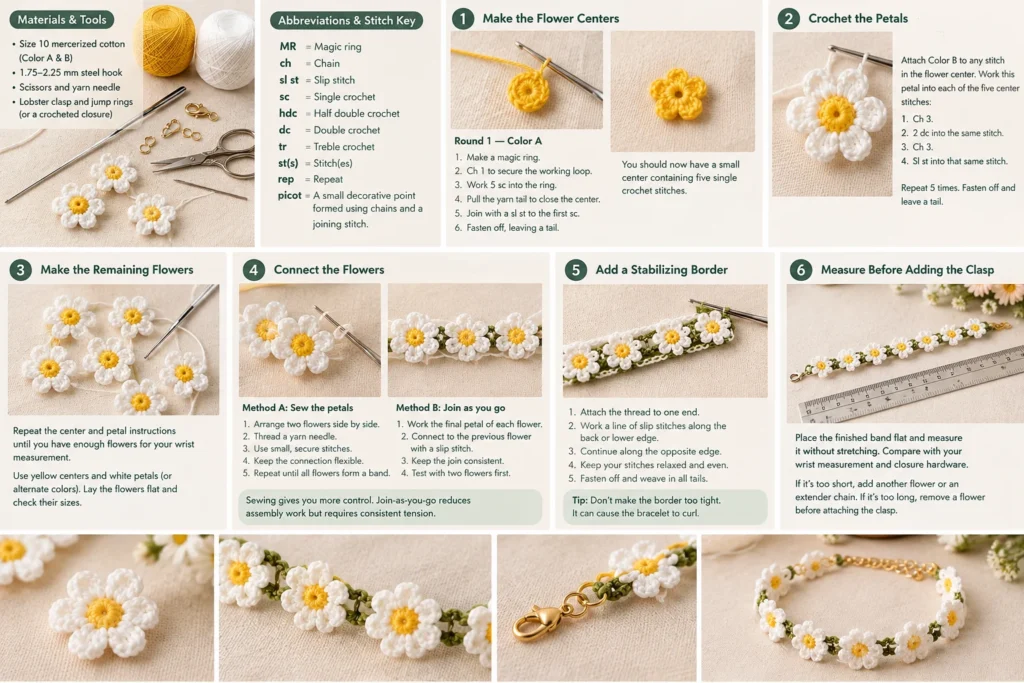
Abbreviations & Stitch Key
The instructions use standard US crochet terminology.
- MR: Magic ring.
- ch: Chain.
- sl st: Slip stitch.
- sc: Single crochet.
- hdc: Half double crochet.
- dc: Double crochet.
- tr: Treble crochet.
- st(s): Stitch(es).
- rep: Repeat.
- picot: A small decorative point formed using chains and a joining stitch.
If you’re unfamiliar with crochet abbreviations or stitch terminology, the Craft Yarn Council’s crochet standards provide a useful reference for understanding common crochet terms and symbols.
Materials for the Main Pattern
- Size 10 mercerized cotton in Color A for the centers.
- Size 10 mercerized cotton in Color B for the petals.
- 1.75–2.25 mm steel hook.
- Scissors and yarn needle.
- Lobster clasp and jump rings, or a crocheted closure.
Step 1: Make the Flower Centers
Round 1 — Color A
- Make a magic ring.
- Ch 1 to secure the working loop.
- Work 5 sc into the ring.
- Pull the yarn tail to close the center.
- Join with a sl st to the first sc.
- Fasten off, leaving a tail long enough to secure the center neatly.
You should now have a small center containing five single crochet stitches. Each stitch will support one petal.
For a beginner-friendly version, make all your centers first. This makes it easier to check that your flowers are approximately the same size.
Step 2: Crochet the Petals
Attach Color B to any stitch in the flower center.
Work the following petal into each of the five center stitches:
- Ch 3.
- Work 2 dc into the same center stitch.
- Ch 3.
- Sl st into that same center stitch to finish the petal.
Repeat this sequence in each of the remaining four center stitches.
After completing five petals, sl st to the base of the first petal if needed to tidy the join. Fasten off and leave a tail for securing.
Important construction note: The petals are deliberately small and rounded. If you prefer longer, more pointed petals, replace the two dc stitches with two tr stitches, but test the larger version before making the entire bracelet.
Step 3: Make the Remaining Flowers
Repeat the center and petal instructions until you have enough flowers for your wrist measurement.
For a classic daisy chain, use yellow centers and white petals. For a colorful floral crochet bracelet, alternate petal colors while keeping the centers consistent.
Lay the flowers flat on a table and compare their sizes. If one flower is noticeably larger, check your stitch tension before continuing.
Step 4: Connect the Flowers
There are two useful joining methods. Choose one and use it consistently throughout the band.
Method A: Sew the flower petals together
- Arrange two flowers side by side with their petals touching.
- Thread a yarn needle with a matching length of cotton thread.
- Use small, secure stitches to connect the adjacent petal edges.
- Keep the connection flexible enough for the bracelet to curve around your wrist.
- Repeat until all flowers form one continuous band.
This method is easy to control and is particularly suitable for beginners.
Method B: Join as you go
If you prefer to avoid sewing every flower together afterward, work the final petal of each new flower and connect its outer chain loop to the corresponding petal loop of the previous flower using a slip stitch.
Because this changes the position and shape of the joining loops, test the method with two flowers before making the full bracelet. Keep the join consistent and avoid pulling the flowers tightly together.
Which method is better? Sewing gives you more control over flower placement. Join-as-you-go construction can reduce assembly work, but it requires consistent tension and careful placement.
Step 5: Add a Stabilizing Border
A narrow crochet border helps the floral band hold together and reduces excessive movement at the joining points.
- Attach the thread to one end of the band.
- Work a line of slip stitches along the back or lower edge, catching the joining points without pulling the flowers out of shape.
- Continue along the opposite edge if the design needs additional stability.
- Keep your stitches relaxed and even.
- Fasten off and weave in all remaining tails securely.
Do not make the border too tight. Excessive tension can cause the bracelet to curl rather than lie flat.
Step 6: Measure Before Adding the Clasp
Place the finished floral band flat on a ruler and measure it without stretching.
Compare this length with your wrist measurement and the size of your closure hardware. If the band is too short, add another flower or use a suitable extender chain. If it is too long, remove a flower before attaching the clasp.
This final measurement is more dependable than estimating bracelet length from flower count alone.
5. Customize Your Floral Crochet Bracelet: Three Petal Variations
Once you understand the basic flower, you can adapt the design to suit different outfits, seasons, and personal styles.
Variation 1: Classic Daisy Chain
The daisy chain crochet bracelet is a timeless choice for spring and summer.
Color palette: White petals, yellow centers, and an optional green connecting chain.
How to customize it: Use the original five-petal flower pattern. Connect the motifs with small, even joins and add a green chain between selected flowers if you want a more botanical look.
This design pairs well with casual outfits and makes a thoughtful handmade gift.
Variation 2: Vintage Rosebud Cuff
For a romantic, vintage-inspired bracelet, use pink, dusty rose, burgundy, or cream thread.
How to customize it:
- Make slightly larger flower centers.
- Add a second layer of small petals behind the first.
- Arrange the flowers closely together.
- Use a wider, reinforced band for a cuff-style finish.
Layered petals create a three-dimensional effect, but they also make the bracelet bulkier. Check that the flowers remain comfortable against your wrist before adding more layers.
Variation 3: Micro-Crochet Cherry Blossom
Cherry blossom flowers are ideal if you prefer a delicate, understated accessory.
Color palette: Pale pink, white, soft green, and optional seed-bead centers.
Use fine crochet thread or suitable embroidery floss, provided the fiber works comfortably with your hook and produces stable stitches.
For a beaded design, make sure every bead is securely attached and does not create a sharp or uncomfortable surface against the skin. Keep the flowers small and use a narrow joining structure to preserve the delicate appearance.
6. Professional Finishing: Stiffen, Block, and Attach Clasps
Finishing makes a significant difference to the appearance and durability of a handmade crochet bracelet. Neat petals, secure ends, and correctly fitted hardware help the accessory look more polished.
How to Block and Stiffen the Flowers
Blocking shapes the petals and helps the band lie flat. Stiffening adds extra firmness when the design needs it.
Option 1: Wet blocking
- Check that your thread and any decorative materials are suitable for water.
- Lightly dampen the crochet flowers.
- Arrange the petals on a clean, flat blocking surface.
- Pin the petals into an even shape without stretching the connecting stitches.
- Allow the bracelet to dry completely before removing the pins.
Wet blocking is a good first choice for cotton flowers that only need gentle shaping.
Option 2: Fabric stiffener
Use a product specifically intended for fabric or craft projects, following its label instructions. Test it on a spare flower first because some products can change the color, feel, or flexibility of the thread.
Apply only enough to support the petals. Too much stiffener can make the bracelet uncomfortable.
Option 3: Diluted PVA glue or light starch
Diluted PVA glue may create a firm finish, but it can leave a visible film and may become brittle. Starch generally provides a lighter hold and can be affected by moisture.
There is no single dilution ratio that works for every product. Follow the manufacturer’s instructions and test your chosen mixture on a sample before applying it to the finished bracelet.
Professional tip: Shape each petal individually while it dries. Avoid coating the entire bracelet so heavily that it loses the flexibility needed to wrap comfortably around your wrist.
How to Attach the Clasp
A lobster clasp is practical for a bracelet that needs to be easy to put on and remove.
- Reinforce the bracelet end. Secure the thread tails and add a few extra stitches at the attachment point if necessary.
- Open a jump ring correctly. Using jewelry pliers, twist the two ends sideways apart rather than pulling them directly outward.
- Attach the ring. Pass it through a reinforced edge stitch or a small, secure crocheted loop.
- Add the lobster clasp. Slide the clasp onto the jump ring.
- Close the ring. Twist the ends back together until they meet securely.
- Repeat at the opposite end. Add a matching jump ring or an extender chain, depending on your design.
- Test the closure. Gently check that the rings stay closed and that the attachment points do not distort the flowers.
Do not rely on jewelry glue alone to secure a clasp to delicate crochet thread. Reinforced stitching and correctly closed metal findings provide the primary mechanical support.
An extender chain is especially useful when making gifts because it offers a little flexibility in sizing without requiring multiple bracelet lengths.
7. Care and Cleaning Guide
Cotton crochet jewelry can last longer when it is kept clean, dry, and stored carefully.
Follow these care tips:
- Remove the bracelet before bathing or swimming. Water, soap, and repeated friction can affect the thread, stiffener, and metal findings.
- Clean gently. If the bracelet needs cleaning, dab it with a soft cloth lightly dampened with cool water and mild soap, after checking that the hardware and finish can tolerate moisture.
- Avoid vigorous rubbing. Delicate petals can snag or stretch if scrubbed.
- Dry flat. Reshape the flowers and allow the bracelet to dry completely before storing it.
- Protect the metal parts. Avoid harsh cleaners that may tarnish or damage plated jewelry findings.
- Store separately. Keep the bracelet in a small pouch or jewelry box away from rough accessories that could catch the thread.
If you have used glue or a commercial stiffener, check the product’s care instructions before attempting to wash the bracelet.
8. Troubleshooting Common Mistakes
Problem: The bracelet curls and will not lie flat.
Solution: Your stitches may be too tight, or the flower joins may be pulling inward. Try a hook 0.25 mm larger, relax your tension, and wet-block the flowers with pins. Check the border for tight slip stitches.
Problem: The bracelet stretches after a few wears.
Solution: Check whether the thread is too elastic or the flower joins are too loose. Use mercerized cotton, reinforce the back of the band with a stabilizing line of slip stitches, and avoid hanging the bracelet by one end.
Problem: The petals look uneven.
Solution: Count the five center stitches before working the petals. Place one petal in each center stitch, use the same number of chains and double crochets, and maintain consistent tension.
Problem: The flowers twist at the joining points.
Solution: Lay the flowers flat before joining them. Use small, even joining stitches and avoid pulling the connecting thread too tightly.
Problem: The clasp pulls through the crochet.
Solution: Reinforce the end with additional stitches or a small crocheted loop. Attach the jump ring through this stronger area instead of a single delicate petal.
Problem: The stiffener makes the flowers too hard.
Solution: Use less product, or choose gentle blocking without stiffener. Always test your chosen finish on a spare motif first.
9. Frequently Asked Questions
What is the best yarn for a floral crochet bracelet?
Mercerized cotton crochet thread is an excellent choice for a floral crochet bracelet. Size 10 thread creates delicate flowers, while size 3 produces larger motifs. Cotton offers good stitch definition and relatively low stretch, although the final firmness depends on the thread, hook, and tension.
How do I prevent my crochet bracelet from stretching over time?
Use a stable cotton thread, secure the flower joins carefully, and add a relaxed slip-stitch reinforcement along the back of the band when needed. Blocking can improve the shape, while a suitable fabric stiffener may provide extra support. Avoid stretching the bracelet when putting it on or taking it off.
Can beginners make a crochet flower bracelet?
Yes. Beginners can make this project using a magic ring, single crochet, chain stitches, double crochet, and slip stitches. The small scale requires patience, but most crocheters can complete a simple bracelet in approximately 45–60 minutes once they are comfortable with the basic stitches.
How do you attach a clasp to a crochet bracelet?
Use jewelry pliers to open a 4–6 mm jump ring sideways. Pass it through a reinforced crochet loop or edge stitch, add the lobster clasp, and close the ring securely. Repeat at the other end, using an extender chain if you want adjustable sizing.
What is the difference between a floral crochet bracelet and a daisy chain crochet bracelet?
A floral crochet bracelet is a general term for crochet jewelry decorated with flowers. A daisy chain crochet bracelet is a specific style that usually features connected daisy-like flowers, often with white petals and yellow centers.
Can I make a crochet flower bracelet without a metal clasp?
Yes. You can make a crocheted button closure, a small chain loop, or a tie closure using matching cotton thread. Make sure the closure is securely attached and comfortable to wear.
How many flowers do I need for a crochet bracelet?
The number depends on your wrist circumference, flower size, and joining method. A small-thread design may need around 6–9 motifs, but measure the actual joined flowers and compare the band length with your wrist before finishing.
Is mercerized cotton waterproof?
No. Mercerized cotton is still cotton and can absorb water. Mercerization improves the thread’s surface appearance and sheen, but it does not make the bracelet waterproof. Keep the finished accessory dry when possible, especially if it contains metal hardware or stiffening products.
Final Thoughts
Making a floral crochet bracelet is a rewarding way to practice small crochet motifs while creating a wearable accessory. With fine cotton thread, consistent flower sizes, careful joining, and secure hardware, you can make a delicate daisy chain or experiment with rosebuds and cherry blossoms.
Start with one flower, check your stitch tension, and measure the band before attaching the clasp. These small steps will help you create a bracelet that looks neat, feels comfortable, and holds its shape better over time.
Once you have mastered this crochet flower bracelet pattern, experiment with new colors, different petal shapes, and adjustable closures to create handmade jewelry for yourself or as a thoughtful gift.
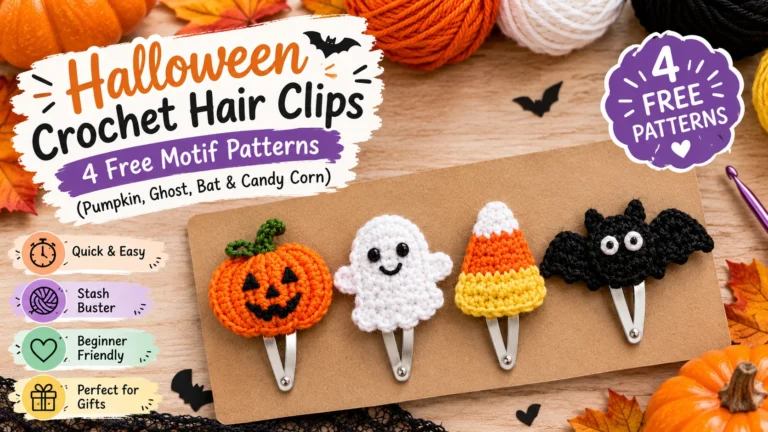
If you enjoy making small crochet accessories, try these Halloween Crochet Hair Clips for another fun project. This free tutorial includes pumpkin, ghost, candy corn, and bat motifs that are perfect for adding a festive touch to your crochet collection.