Free Crochet Ghost Pattern: Easy Guide + 5 Variations
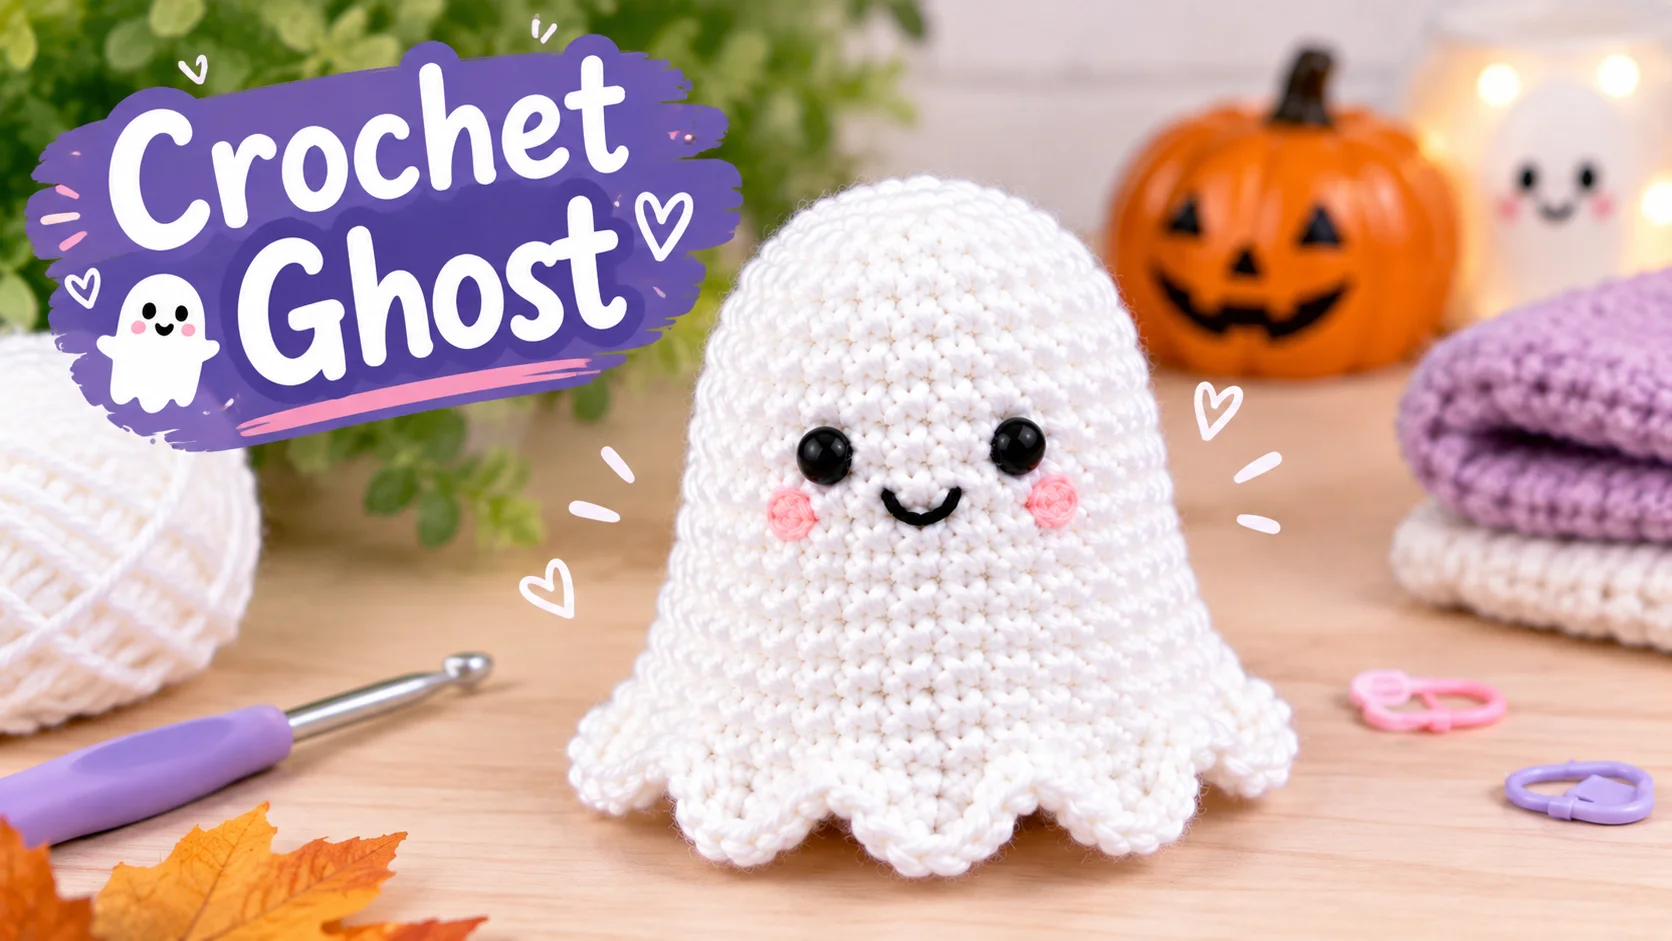
Whether it’s October or the middle of summer, a little white ghost makes any handmade collection feel cozy. A crochet ghost is a small handmade figure crocheted from yarn — typically in white or pastel colors — that resembles a classic ghost shape. They are most popular as Halloween decorations but can be used year-round as keychains, ornaments, bag charms, and amigurumi plushies.
This free crochet ghost pattern walks you through every round of a stuffed crochet ghost amigurumi, with stitch counts, photo cues, and a floaty chain-loop hem. You’ll also find five variations, creative ways to display your crochet ghost Halloween decor, expert tips, and answers to the questions crocheters ask most.
This pattern is beginner-friendly: if you can work a magic ring and a single crochet, you’re ready. It uses only basic stitches and needs no sewing. Plan on 1–2 hours for your first ghost, and less once you’ve made a few.
Table of Contents
What You’ll Need: Materials & Tools
Yarn
- Type: Worsted weight (#4) for a full, defined shape
- Color: White for the classic look; off-white, light gray, or pastel pink and blue for cute twists
- Amount: About 50–100 yards for a standard-sized ghost
- Bonus: Plush or velvet yarn makes an extra-soft ghost
Crochet Hook
- Standard: 4.0mm (G) for worsted weight
- Chunkier: 5.0–6.0mm for a bigger, quicker ghost
- Mini: 3.5mm (E) for a keychain-size ghost
Other Materials
- Polyester fiberfill stuffing
- 12mm safety eyes (or black embroidery thread for a toy-safe version)
- Yarn needle (tapestry needle) and scissors
- Optional: stitch markers; wire or pipe cleaner for poseable arms
Crochet Stitches Used in This Pattern
- Magic ring (MR): an adjustable ring for starting in the round
- Single crochet (sc): the main stitch throughout
- Increase (inc): two sc in the same stitch
- Invisible decrease (invdec): a smooth, tight decrease worked in the front loops of two stitches
- Slip stitch (sl st): joins rounds and finishes off
Skill level: Beginner. No prior amigurumi experience required.
Free Crochet Ghost Pattern — Step-by-Step Instructions
Pattern Details at a Glance
| Detail | Specification |
|---|---|
| Skill Level | Beginner |
| Finished Size | Approx. 4 inches tall (with worsted weight) |
| Yarn Weight | #4 Worsted Weight |
| Hook Size | 4.0mm (G hook) |
| Safety Eyes | 12mm |
| Time to Complete | 1–2 hours |
| Pattern Type | Amigurumi (worked in continuous rounds) |
Abbreviations
MR = magic ring | sc = single crochet | inc = increase (2 sc in one stitch) | invdec = invisible decrease | sl st = slip stitch | ch = chain | R = round
Step 1 — Make the Magic Ring
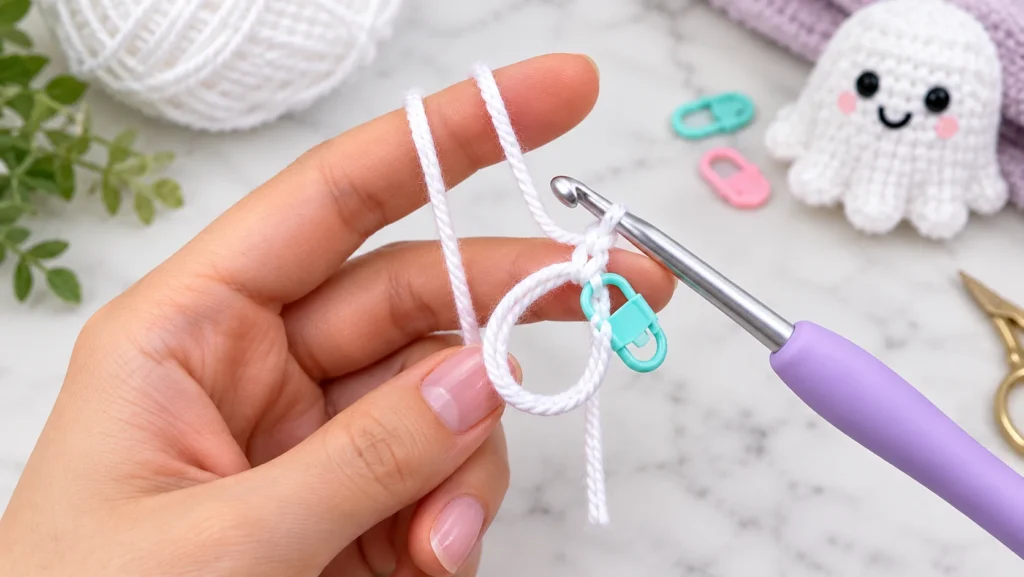
Wrap the yarn around two fingers to form a loop, insert your hook, pull up a loop, and chain 1 to lock it. Leave a 6-inch tail. Place a stitch marker in the first stitch of each round and move it up as you go; the ghost is worked in a spiral without joining.
Step 2 — Crochet the Ghost Head (Rounds 1–8)
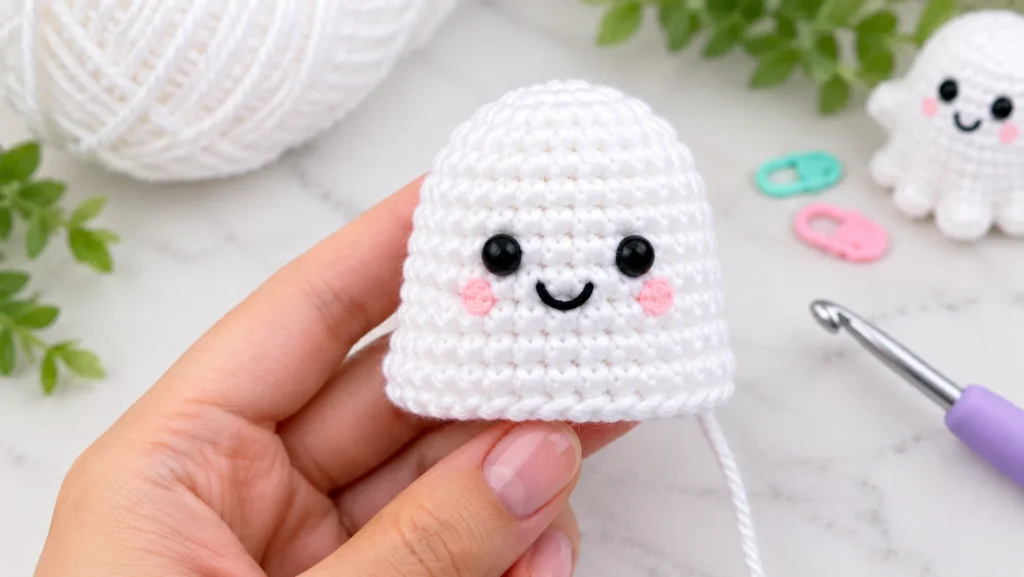
- R1: 6 sc in the ring (6). Pull the tail to close the ring.
- R2: inc in each stitch (12)
- R3: (sc, inc) × 6 (18)
- R4: (2 sc, inc) × 6 (24)
- R5: (3 sc, inc) × 6 (30)
- R6: (4 sc, inc) × 6 (36)
- R7–8: sc in each stitch (36)
Step 3 — Crochet the Ghost Body (Rounds 9–15)
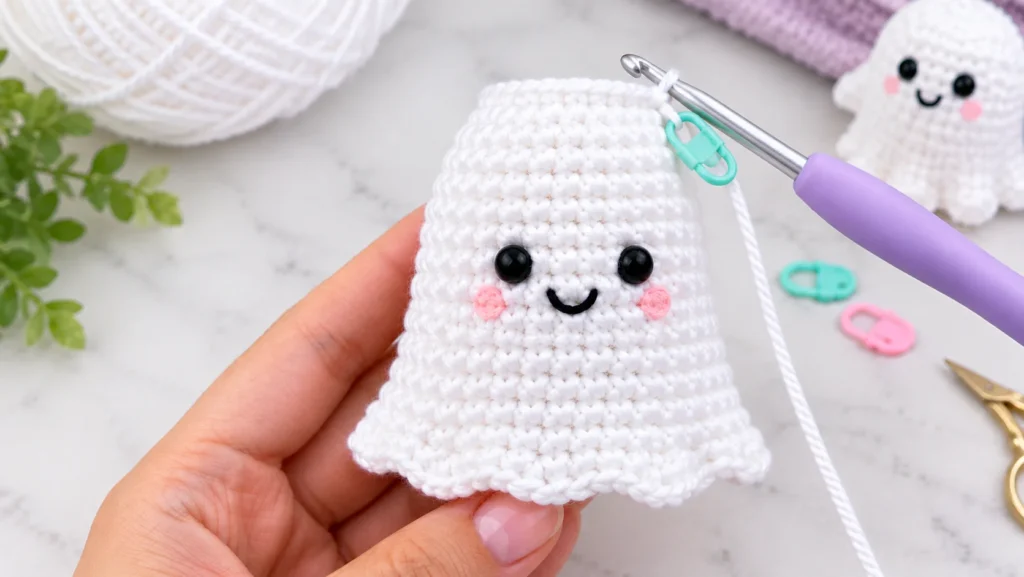
- R9: (4 sc, invdec) × 6 (30). This forms a gentle neck.
- R10: sc in each stitch (30)
- R11: (4 sc, inc) × 6 (36)
- R12: (5 sc, inc) × 6 (42)
- R13–15: sc in each stitch (42)
Don’t fasten off yet.
Step 4 — Shape the Wavy Bottom Hem
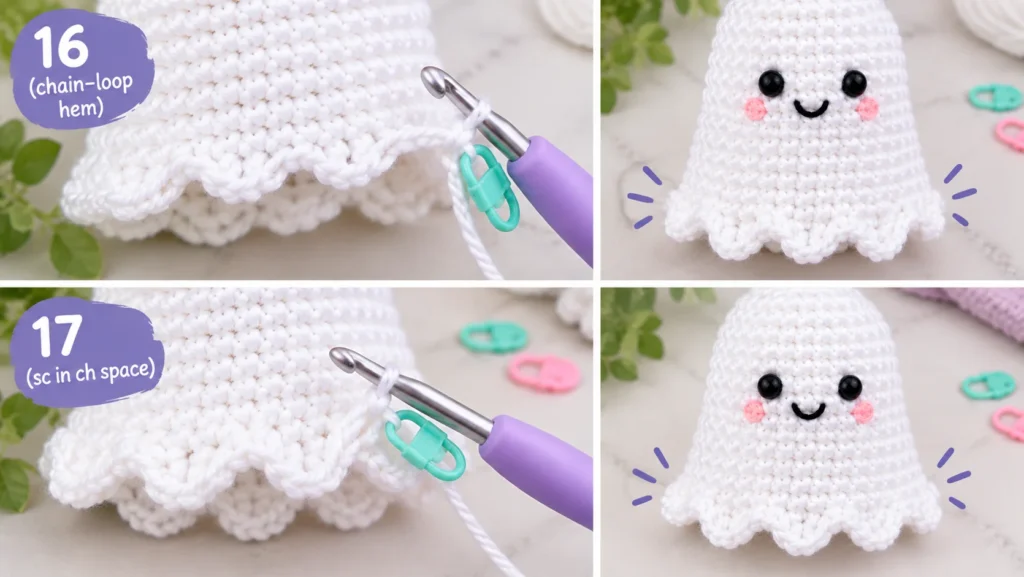
The hem is the ghost’s signature floaty base, and it’s what sets it apart from a flat-bottomed doll. Chain loops create the waves, so there’s no seaming.
- R16: sc in the next stitch, ch 4, skip 2 stitches; repeat 14 times. Sl st in the first sc to join (14 loops).
- R17: 4 sc in the next ch-4 space, sc in the next sc; repeat 14 times (70). Sl st to join, then fasten off, leaving a 6-inch tail.
Step 5 — Insert Safety Eyes & Add Stuffing
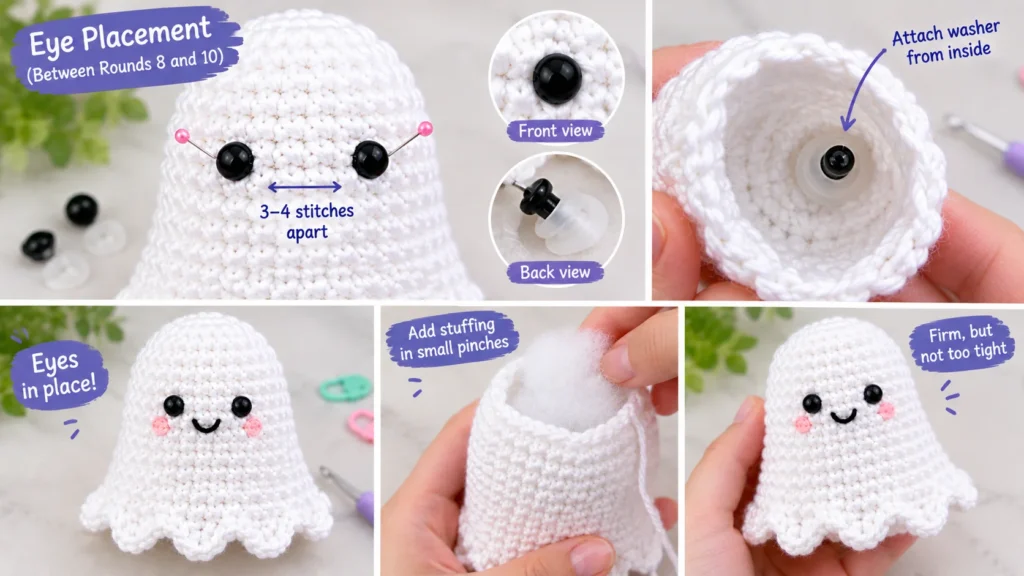
Push the 12mm safety eyes through the fabric between Rounds 8 and 10, about 3–4 stitches apart. Pin them in place first to check the look, then snap on the washers from the inside. Stuff the head and upper body in small pinches: firm, but not so tight that the stitches stretch and the yarn shows through.
Step 6 — Finish & Weave Ends
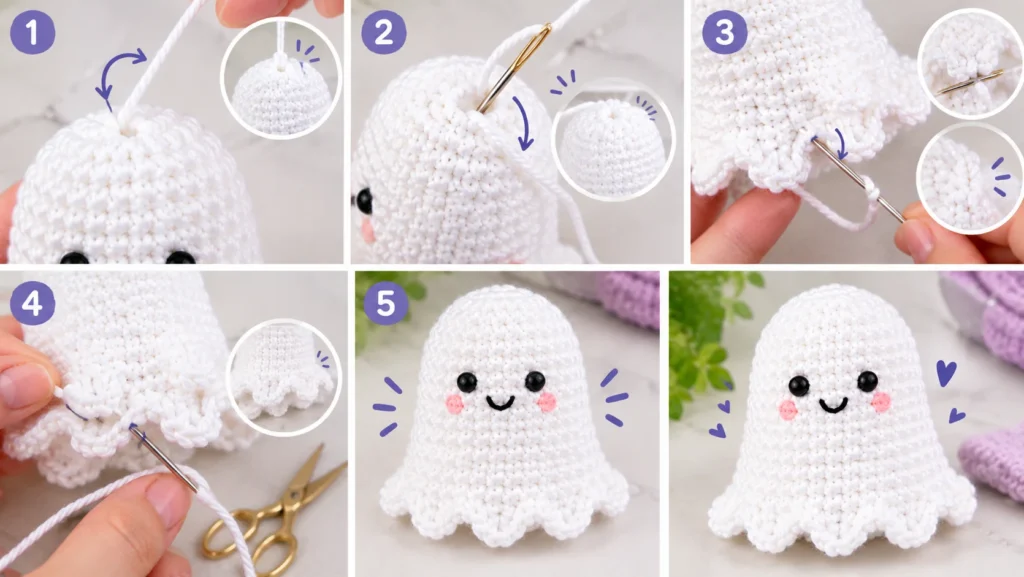
Pull the magic ring tail snug to close the hole at the top of the head, knot it, and weave it into the body. For the hem tail, make an invisible fasten-off: thread the tail on your yarn needle, pass it under the V of the next stitch, then back down through the center of the last stitch. Weave the end inside and trim.
Optional — Add Facial Details
Embroider a tiny smile with black thread, add blush cheeks with pink yarn, or finish with a bow or a tiny hat.
5 Crochet Ghost Variations to Try
1. Crochet Ghost Amigurumi (3D Stuffed)
The full pattern above. A crochet ghost amigurumi uses a magic ring, fiberfill, and safety eyes for a plush, cuddly finish.
2. Crochet Ghost Applique (Flat)
Perfect for Halloween banners, trick-or-treat bags, and embellishments. Use a 3.5mm hook, skip the stuffing, work two flat rounds, then surface-stitch the face details.
3. Crochet Ghost Keychain / Bag Charm
A mini version of the amigurumi with a lobster clasp or key ring added at the top. It’s a quick, adorable gift.
4. Crochet Ghost Gnome
Add a gnome hat and beard to the ghost body for an October crossover favorite. Display it standing or hanging.
5. Mini Crochet Ghost (for Garland & Ornaments)
Work just 5–6 rounds, then string 6–10 together for a ghost garland. Minis double as Christmas tree ornaments for a year-round angle.
Creative Ways to Use Your Crochet Ghost
A crochet ghost Halloween display is just the beginning:
- Halloween garland, mixed with bats and pumpkins
- Trick-or-treat bag embellishment
- Keychain or purse charm
- Bowl filler or tiered tray decoration
- Party favors (quick to make in bulk)
- Gift topper for the Halloween season
- Car rear-view mirror charm
- Wreath embellishment
Tips for Crocheting the Perfect Ghost
- Yarn tension: Keep it consistent within each round for a smooth, round head.
- Stuffing: Fill firmly, but not so tight that it distorts the shape.
- Eye placement: Position the eyes low on the face, in the lower third of the head, for the most classic ghost look.
- Wavy hem: Use more chains (ch 5, then 5 sc per loop) for a flowy, dramatic hem, or fewer (ch 3, then 3 sc) for a stiffer base.
- Color play: Pastel pink, lavender, mint, and yellow ghosts are trending.
- Blocking: A light steam block helps flatten applique versions.
- Scaling up: Bulky (#6) yarn and a 6mm hook make a jumbo ghost in about 30 minutes.
Frequently Asked Questions About Crochet Ghost Patterns
How do you crochet a ghost step by step?
To crochet a ghost, start with a magic ring and work continuous rounds of single crochet, increasing to shape the head, tapering slightly at the neck, then widening the body and finishing with a wavy chain hem. Add safety eyes, stuff with fiberfill, and fasten off. See the full step-by-step instructions above.
What yarn is best for a crochet ghost?
Worsted weight (#4) white yarn is the most common choice for a crochet ghost because it creates a defined shape and is easy for beginners to work with. Plush or velvet yarn produces an extra-soft ghost, ideal for toys and children.
How long does it take to crochet a ghost?
A basic crochet ghost amigurumi takes about 1 to 2 hours for a beginner. Experienced crocheters can finish one in 30–45 minutes, and mini versions for garlands take under 20 minutes.
What hook size do I need for a crochet ghost?
A 4.0mm (G) crochet hook is standard for a worsted weight ghost. Use a 3.5mm hook for a tighter, smaller ghost and a 5.0–6.0mm hook for a larger, chunkier version.
Can beginners crochet a ghost?
Yes, ghosts are among the best beginner amigurumi projects. Most patterns only require single crochet, increases, and decreases — the three fundamental amigurumi stitches.
How do you make a no-sew crochet ghost?
A no-sew ghost is worked in one continuous piece from the top of the head to the bottom hem. If you add arms, crochet them directly onto the body mid-round instead of sewing them on. The wavy hem is made with chains, so no seaming is needed.
How do you add eyes to a crochet ghost?
Push 12mm safety eyes through the fabric between Rounds 8 and 10, about 3–4 stitches apart, then secure the washers on the inside before stuffing. For child-safe toys, embroider the eyes with black yarn instead.
What is the difference between a crochet ghost amigurumi and a crochet ghost applique?
A crochet ghost amigurumi is a 3D stuffed figure worked in the round, used as a toy, ornament, or decorative plush. A crochet ghost applique is flat, worked back and forth or in partial rounds, and sewn onto items like bags, hats, or blankets as a decorative patch.
Ready to Make Your Own?
This crochet ghost is a quick, forgiving project that works up in an afternoon and looks adorable on a shelf, a bag, or a garland. Grab a skein of white worsted weight yarn, follow the steps above, and don’t be afraid to experiment with pastel colors and sweet little faces.
We’d love to see your finished ghost! save this pattern to Pinterest so it’s ready when spooky season rolls around. If you enjoyed this one, check out our other Halloween amigurumi patterns, like bats and pumpkins, and build a whole haunted collection. Happy hooking!